Introduction
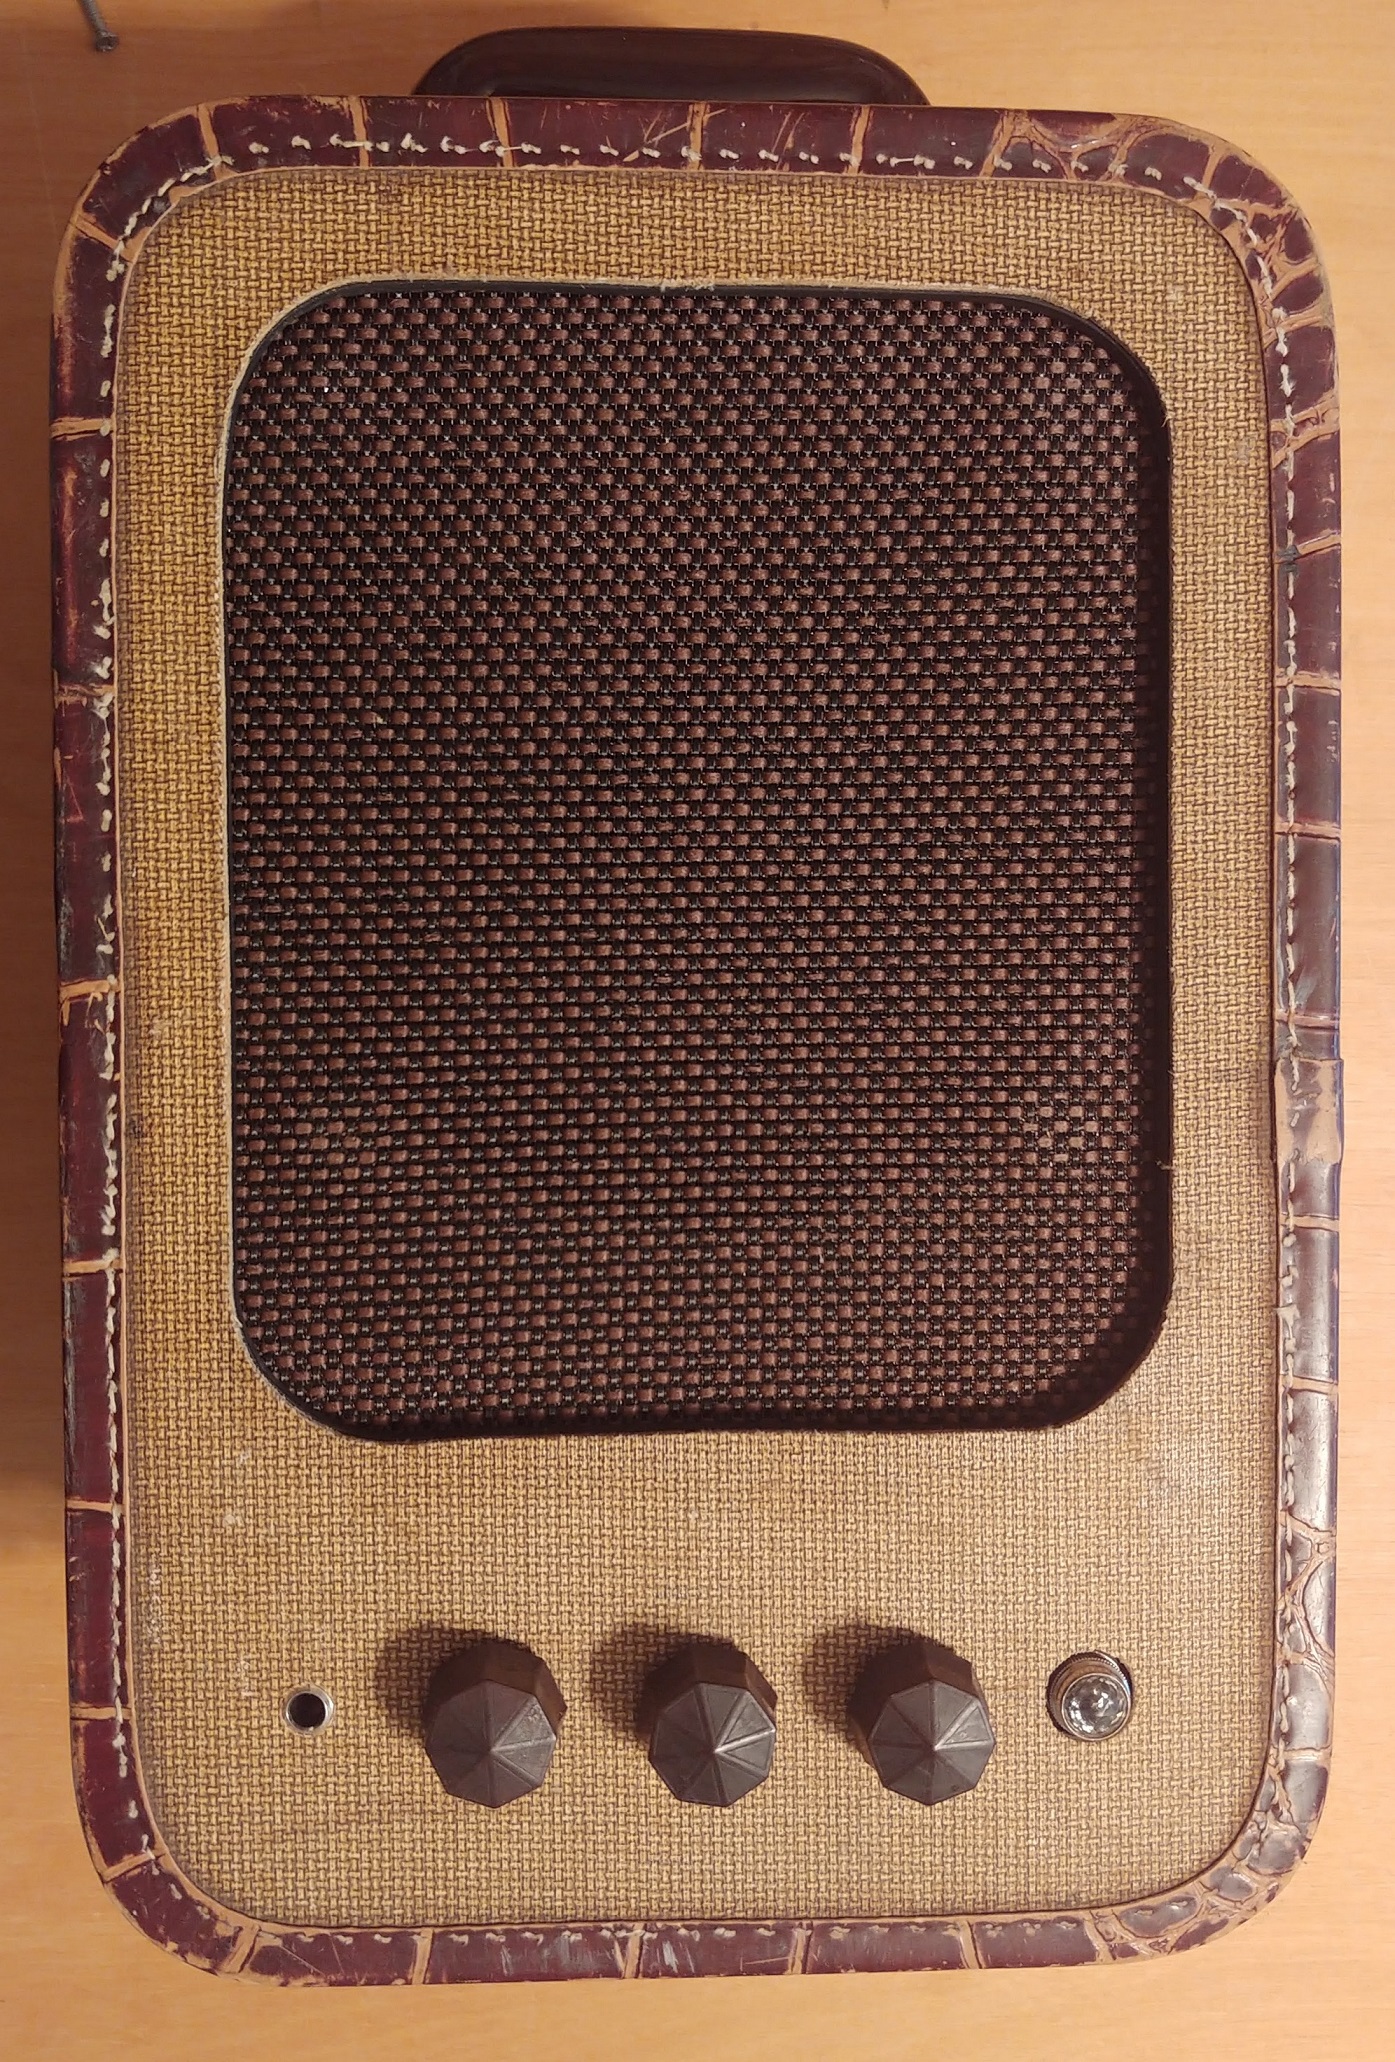
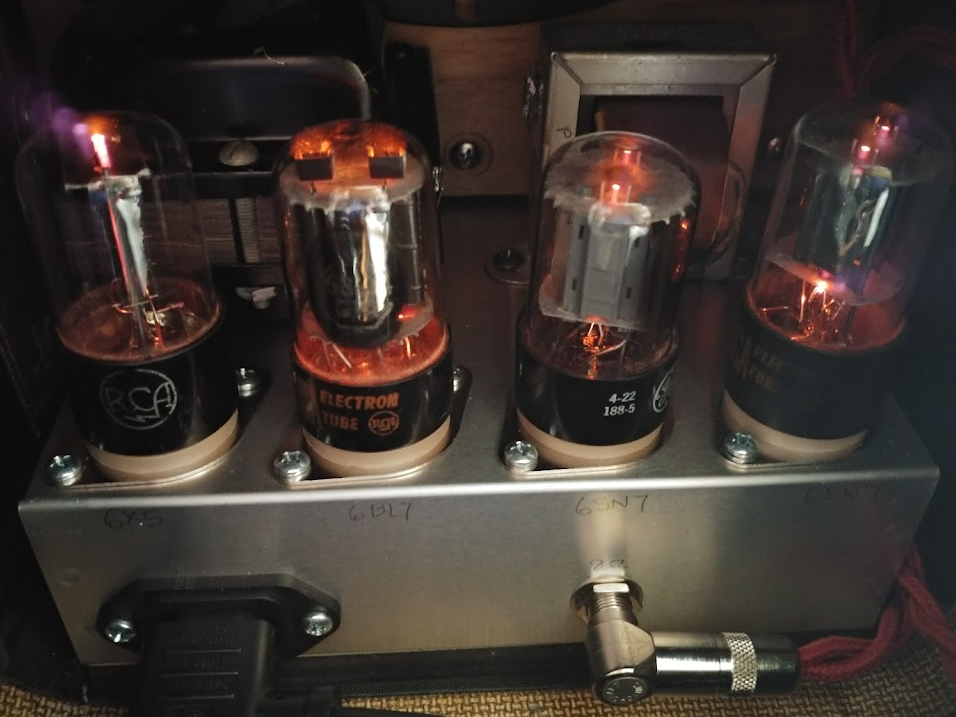
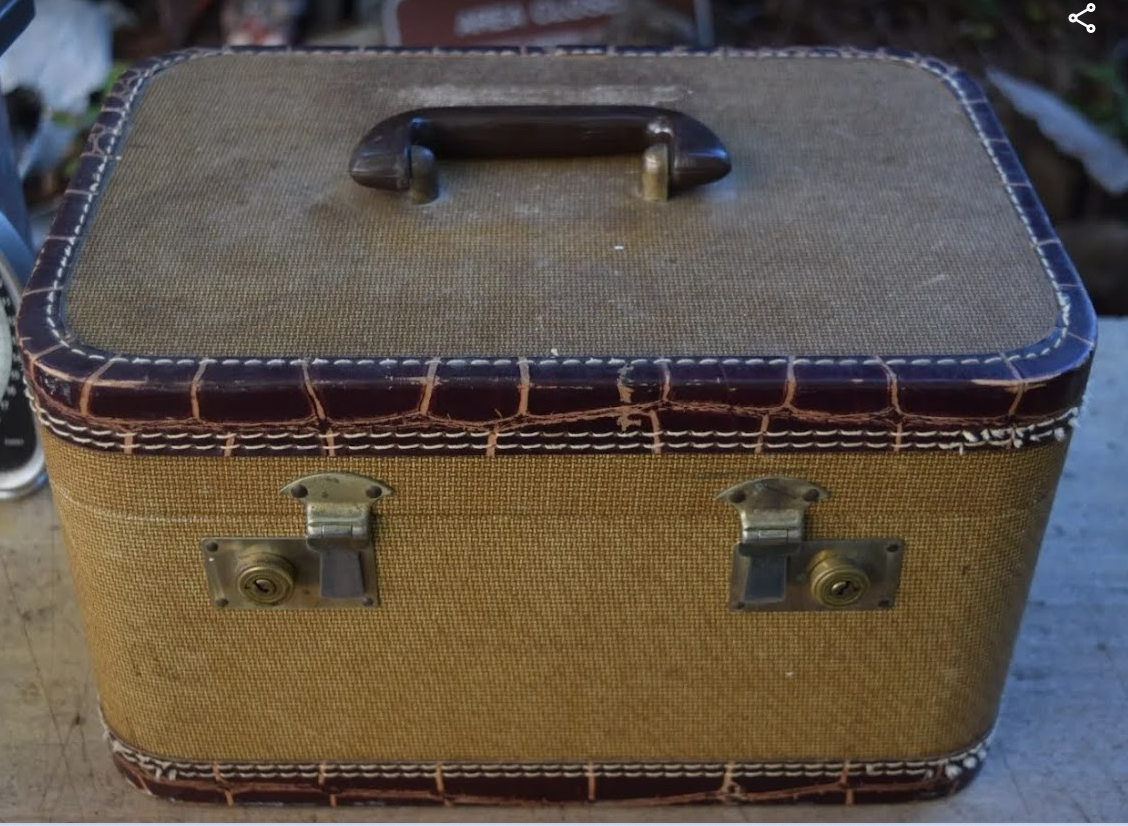
The Weekender is a vintage tube guitar amp that began life as a 1940’s small train/makeup suitcase. It is based on the circuit design of the Westy and Moonlighter. Weekender produces a solid 10-12 watts running through a push pull output stage. The preamp is powered by a dual triode 6SN7 that has the same drive as many vintage Fender and Valcos. It runs through a massive Weber 8” speaker and includes a master volume and tone control. The transformers in Weekender come from a 1940’s Webster 2010 reel to reel recorder that had a similar tube complement as is used here.
The amp is very well laid out and includes a great sounding design that is reminiscent of vintage tweed guitar amps. The tone achieved from this amp is great with a good amount of clean headroom.

Cabinet
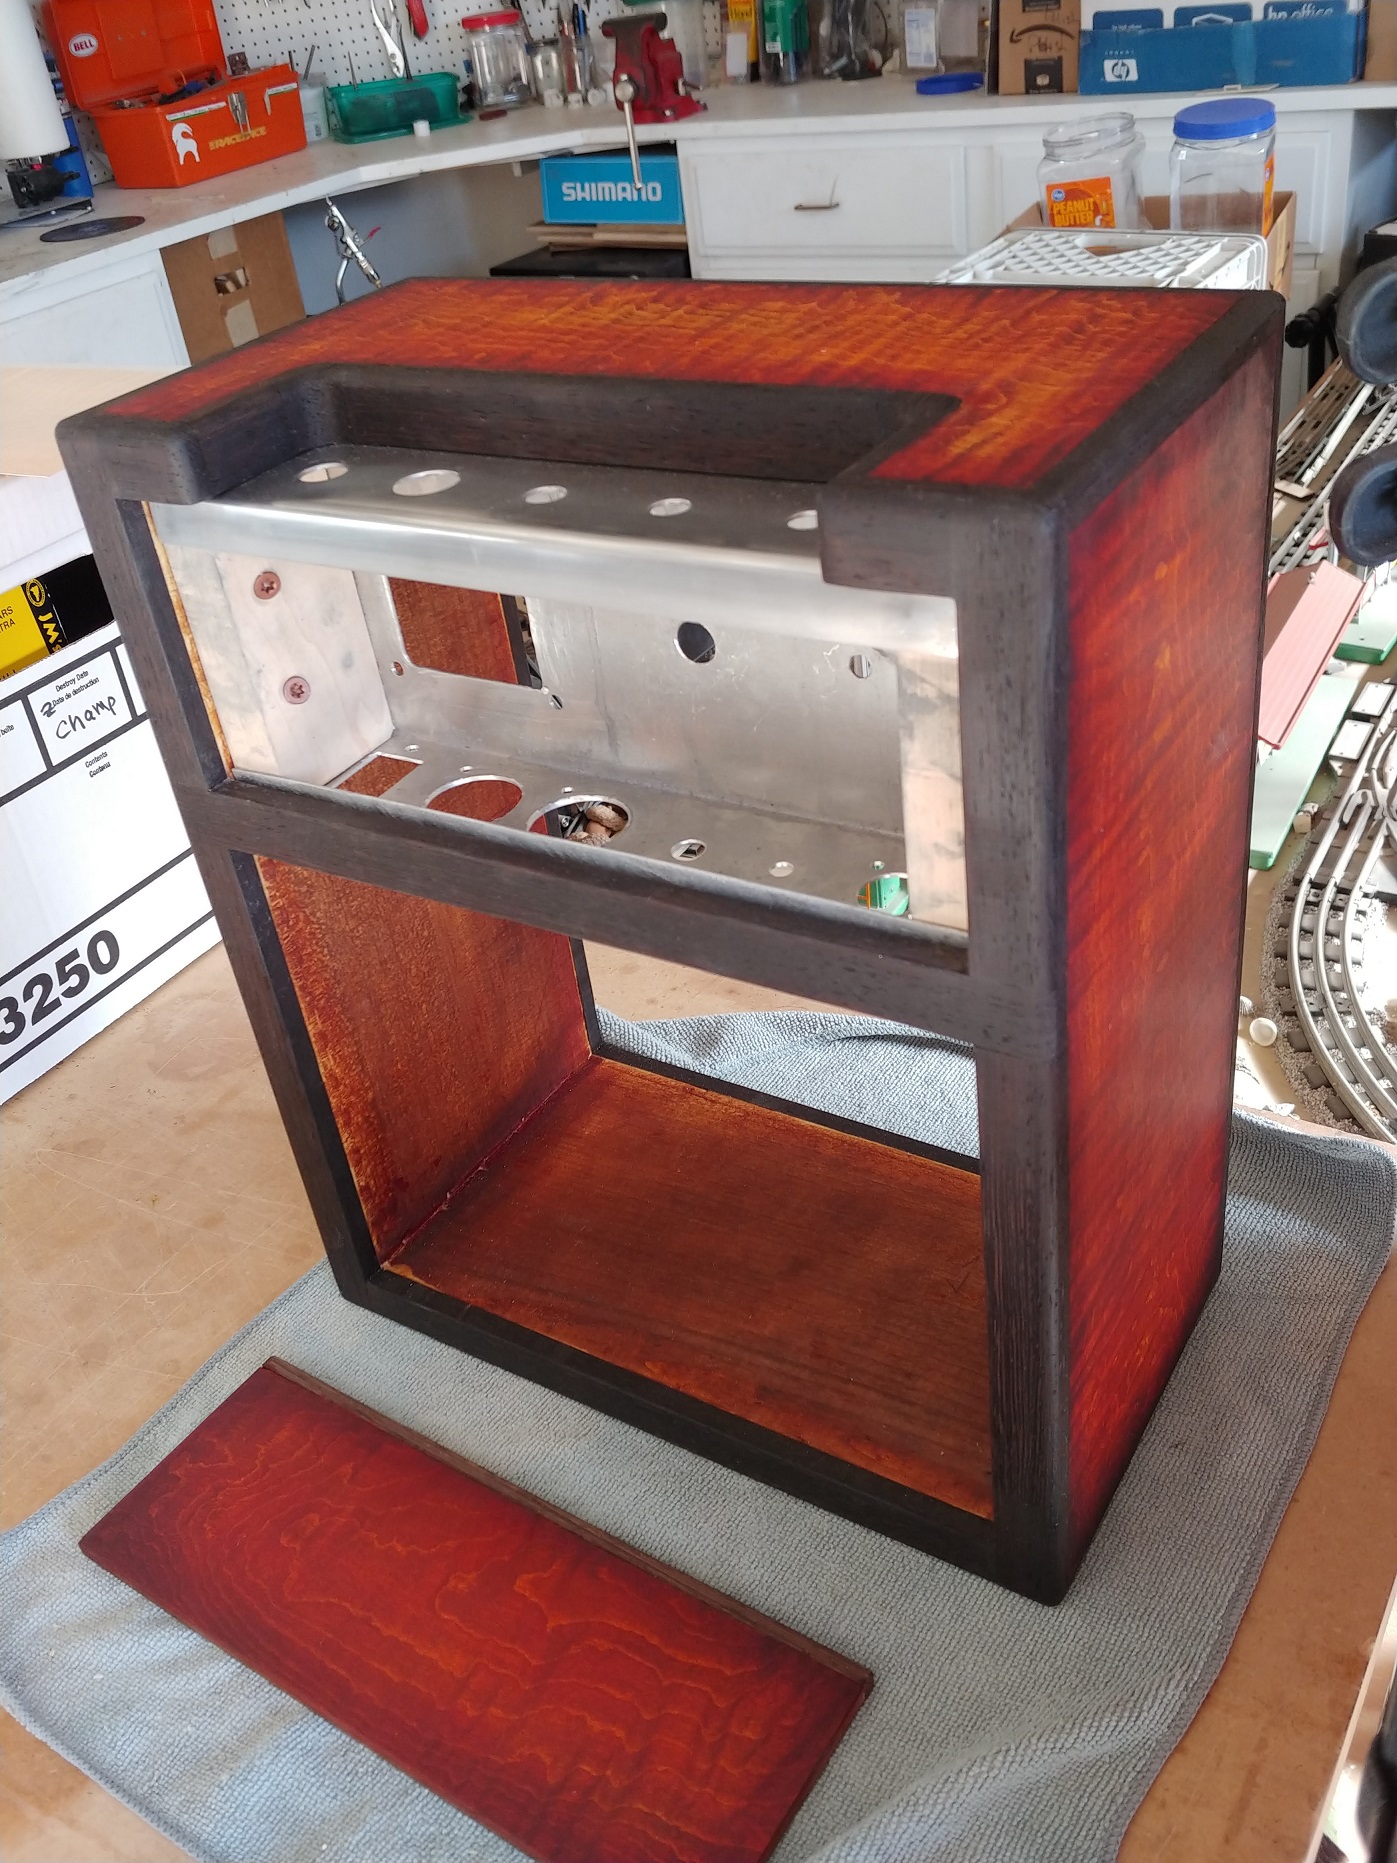
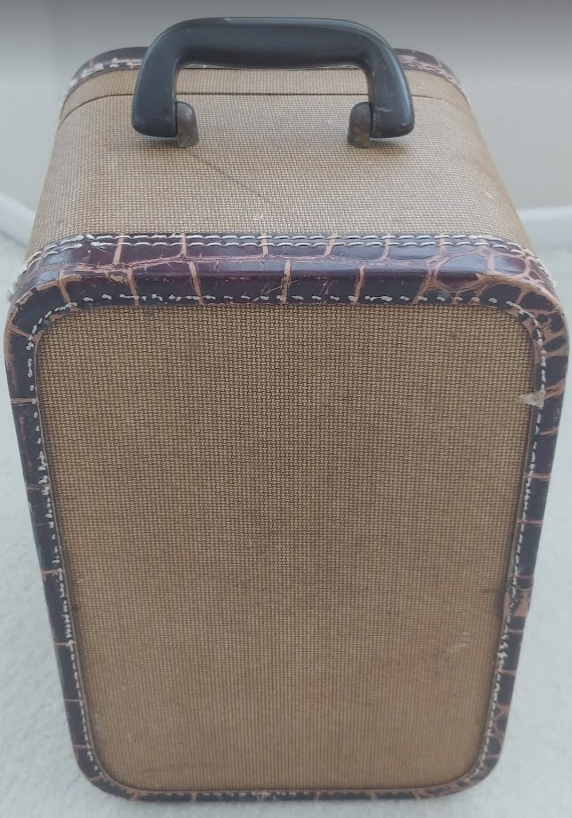
The original suitcase needed to be stood on its end so the handle was removed and relocated to the new top. Then the speaker baffle needed to be designed and installed. The chassis is housed in a small aluminum box installed on the new bottom with rubber feet.


Cutouts
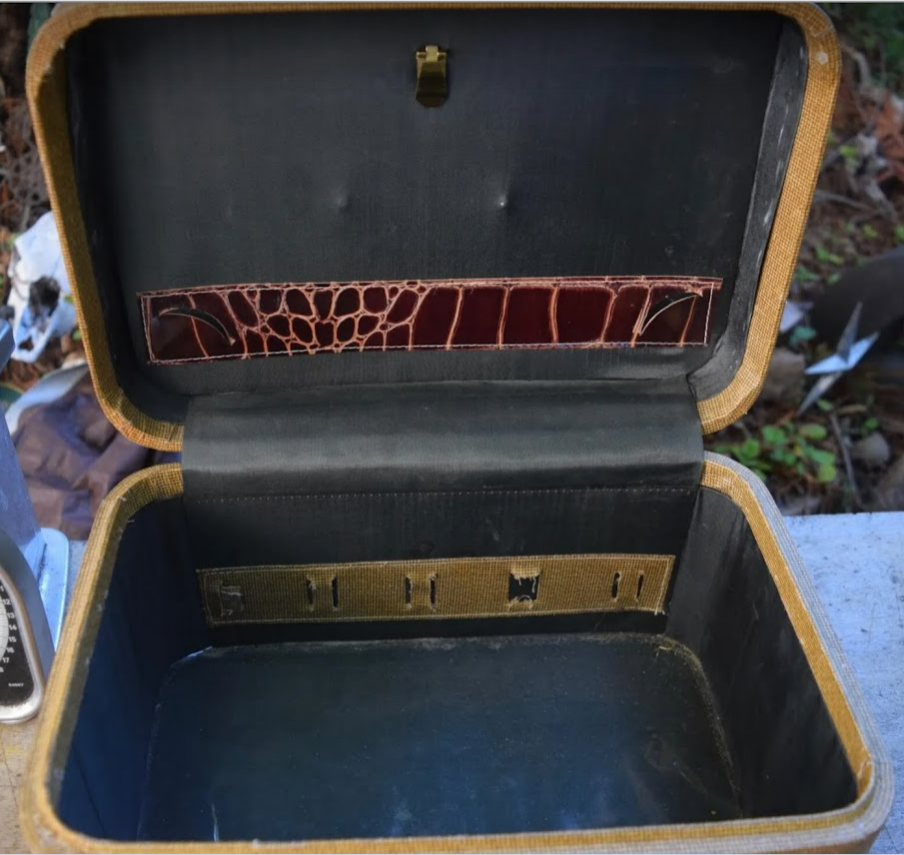
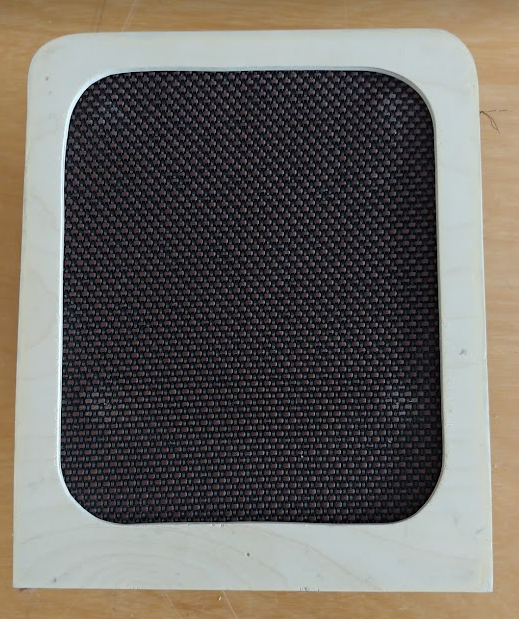
Two cutouts are required for the front speaker and for the reasonable tube cooling. These cutouts are made to optimize the need. In the case of the speaker, the cutoff just matched the speaker opening. For the rear cutout size was a small as possible but still had to remove the original holes for the original handle location. Stylish, period correct gill cloth was added to the speaker baffle to somewhat match the dark vinyl border.


Latches
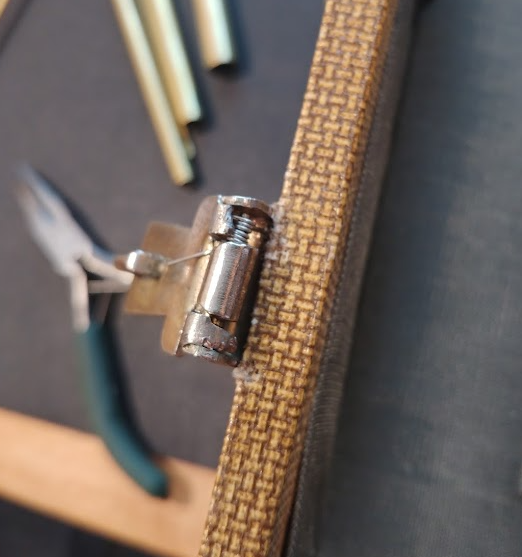
The latches in the cabinet were old and the springs had broken so they no longer were working. Tiny springs that are impossible to find so homemade springs were constructed without success and the installation of these springs was very difficult. The cast metal of the latch ended up breaking so a small tube was made to allow the hasp pin to pivot.
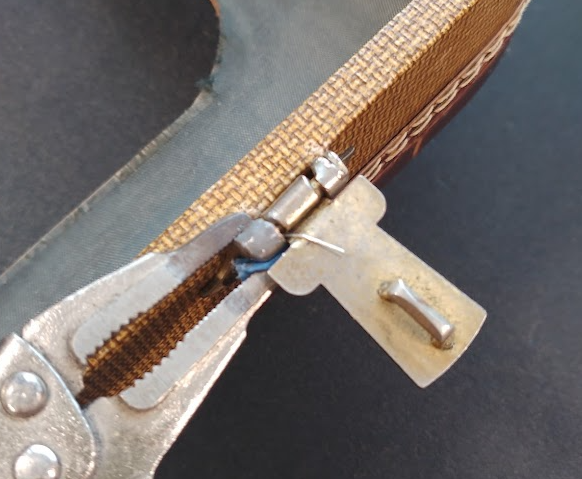
Using a 20 gauge guitar string it was possible to fabricate a couple f springs in the exact style and dimensions of the original broken springs. These were carefully installed with enough spring tension to allow the latch to snap back into place when opened.
The latch needed to be removed in order to install the springs; this was accomplished by carefully bending the tab that held the rotating pin in place. Since this was cast metal it was risky to bend without heat (and heat would damage the tweed without completely removing the latch. Unfortunately one of the tabs broke off but this was repaired with a small piece of brass tubing and and inner liner to rotate. The entire assembly was then cold welded in place using from JB Weld.It holds well.


Here you can see the old broken spring next to the newly wound spring, A near perfect match. Two of these had to be fabricated and tensioned during install.
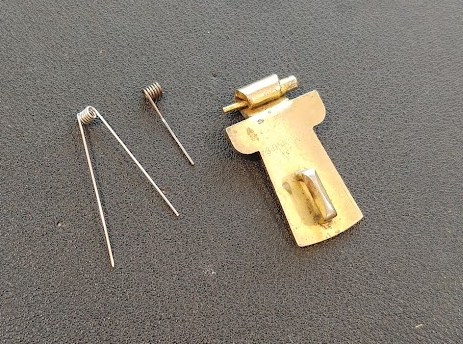
Here you can see the broken tab that needed to be repaired with a small half round spacer and brass tube. Then glued in place with JB Weld.
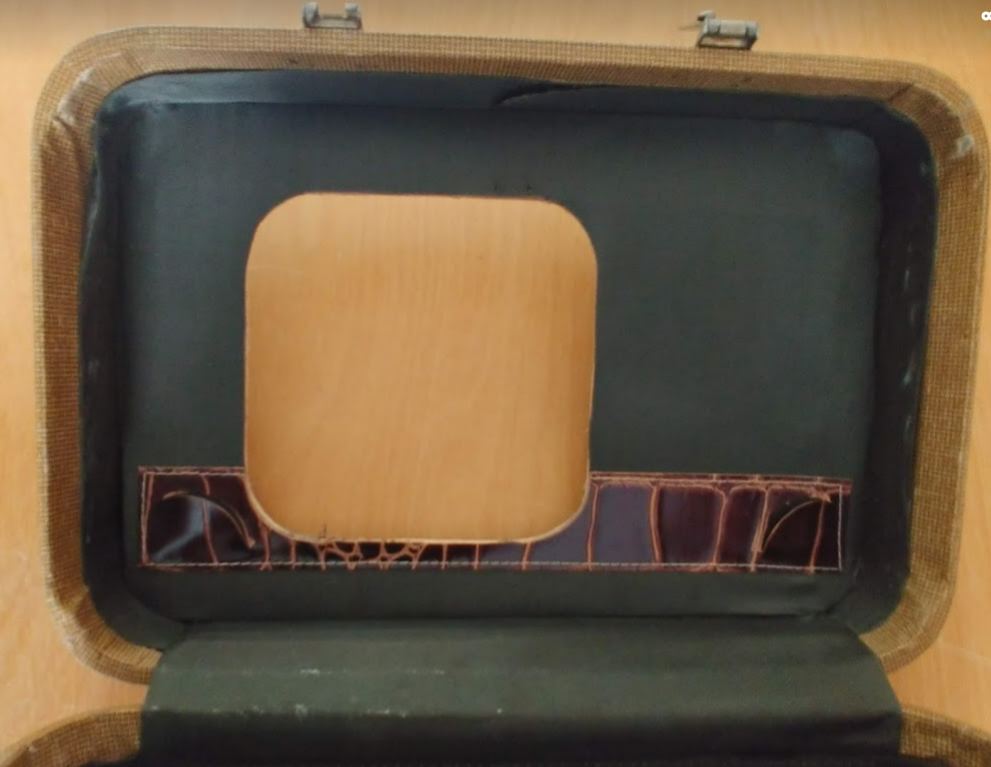
Speaker Baffle and Mount
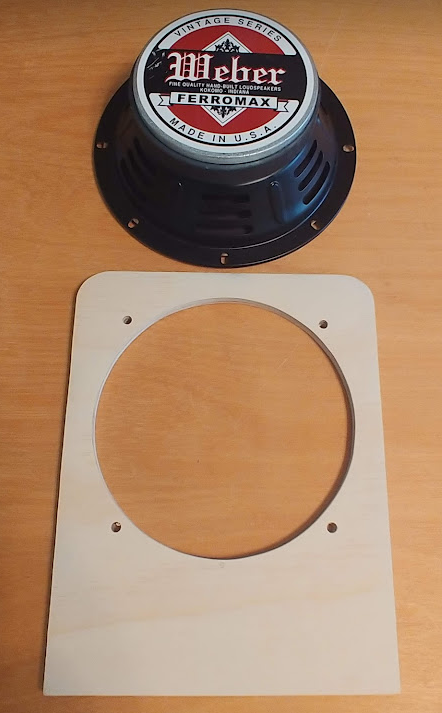
The speaker baffle is cut out of ½” baltic ply for solid mounting of the beefy Weber 8F125 8” speaker. A 7” baffle cutout perfectly matches the speaker opening, #10 T-Nuts and Bolts are used to secure the speaker at its corners. The outside is painted flat black to hide the wood through the grill and the back is stained to match the outside tweed of the cabinet. Finally, collared screws mount the baffle to the cabinet.


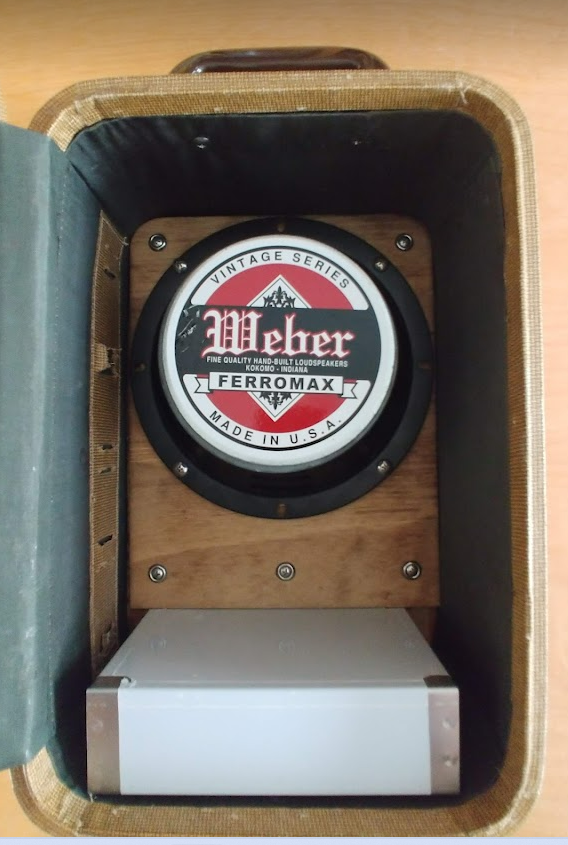
It turned out the case itself was not thick enough to allow a good mounting surface for the speaker baffle. So a ¼” plywood reinforcement mounting plate was designed, painted black and glued to the front of the cabinet. The speaker baffle was then attached to the cabinet mounting plate. A solid cabinet with a solid speaker mount to provide a solid strong sound.


Chassis
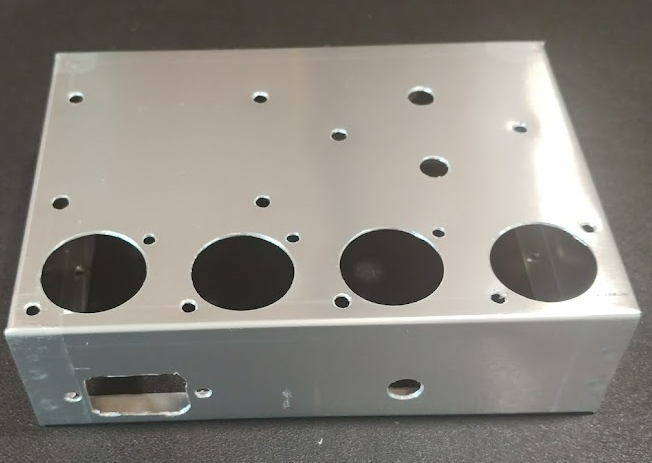
The chassis was created from an aluminum Hammon project box (7”x5”x2”), a perfect fit within the Weekender cabinet. As always small chassis like this prove to require a lot of layout consideration to get everything to fit as well as to fit with proper electromechanical operation. First the front panel layout was designed from left to right pilot, volume/on-off switch, tone, master and guitar input. To get the correct height to center for the front panel, the chassis was lifted with a small piece of plywood then mounted in the cabinet. Small pilot holes were drilled through the front of the cabinet into the chassis so that the proper sized holes for pots jacks and lights could be drilled in the right location. Next the transformers were located in the best orientation within the cabinet and with respect to each other to minimize any intereferrence. The Tubes were located in the rear of the chassis in order from left to right 6X5 (Rectifier), 6BL7 (Power triodes), 6SL7 (Phase INverter), and 6SL7 (preamp). Finally the speaker jack and the power receptacle were mounted in the back side low enough to allow clearance for the tube sockets directly above them. Everything was laid out on paper before any cutting commenced. Tape was added to the chassis before drilling to prevent any accidental scratches. A new deburring hand tool was used on this chassis to clean up the drill burrs. Highly recommended,


Circuit
It turned out that in the original design the 6SL7 (much like a 12AX7) tubes used in the PreAmp and Phase Inverter locations proved to have too much gain. So these were replaced with the lower gain 6SN7. This provided a great sound and still had significant volume. Additionally, the tone stack was modified from the 5E3 to reduce the bass cap from .005uf to .001uf; this gives a great sounding bass response and less intermediate frequency cut. Sounds really good with this setup