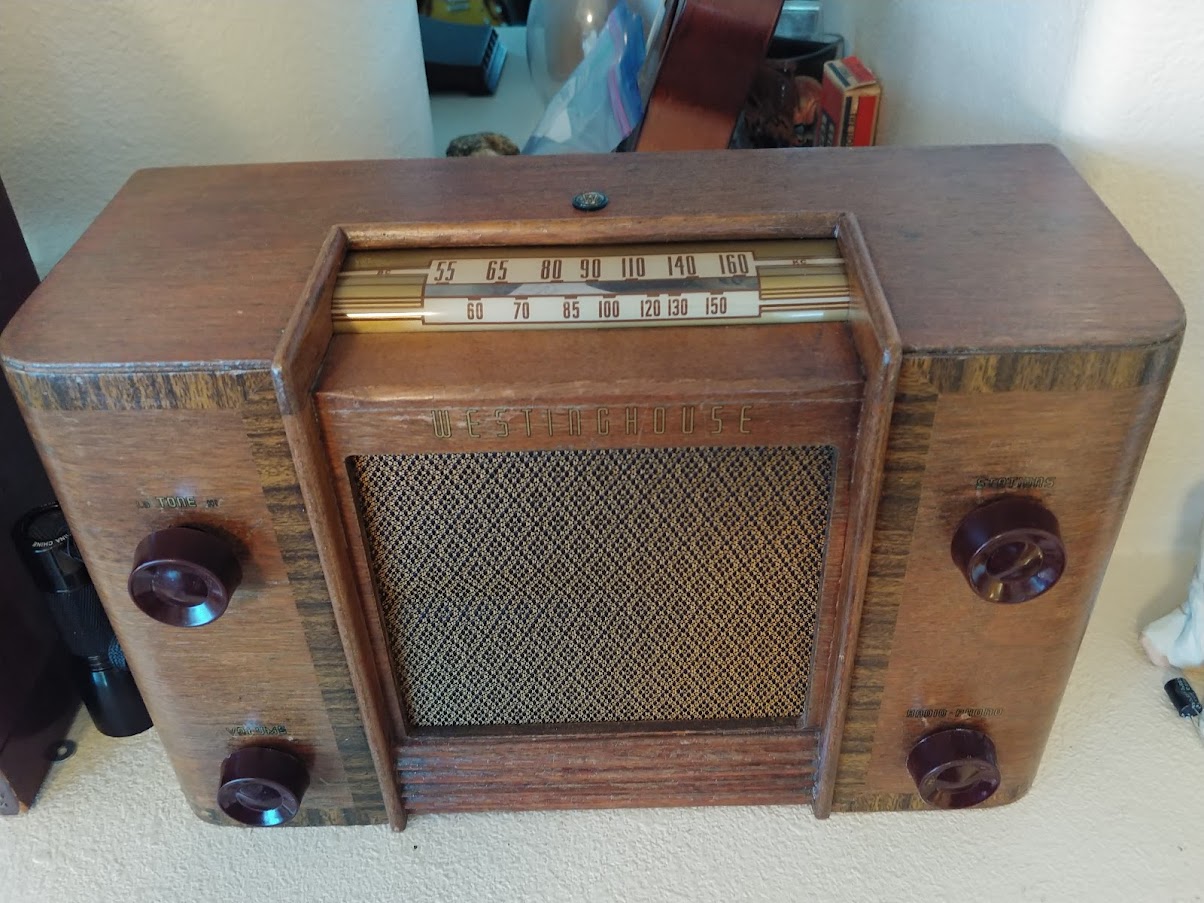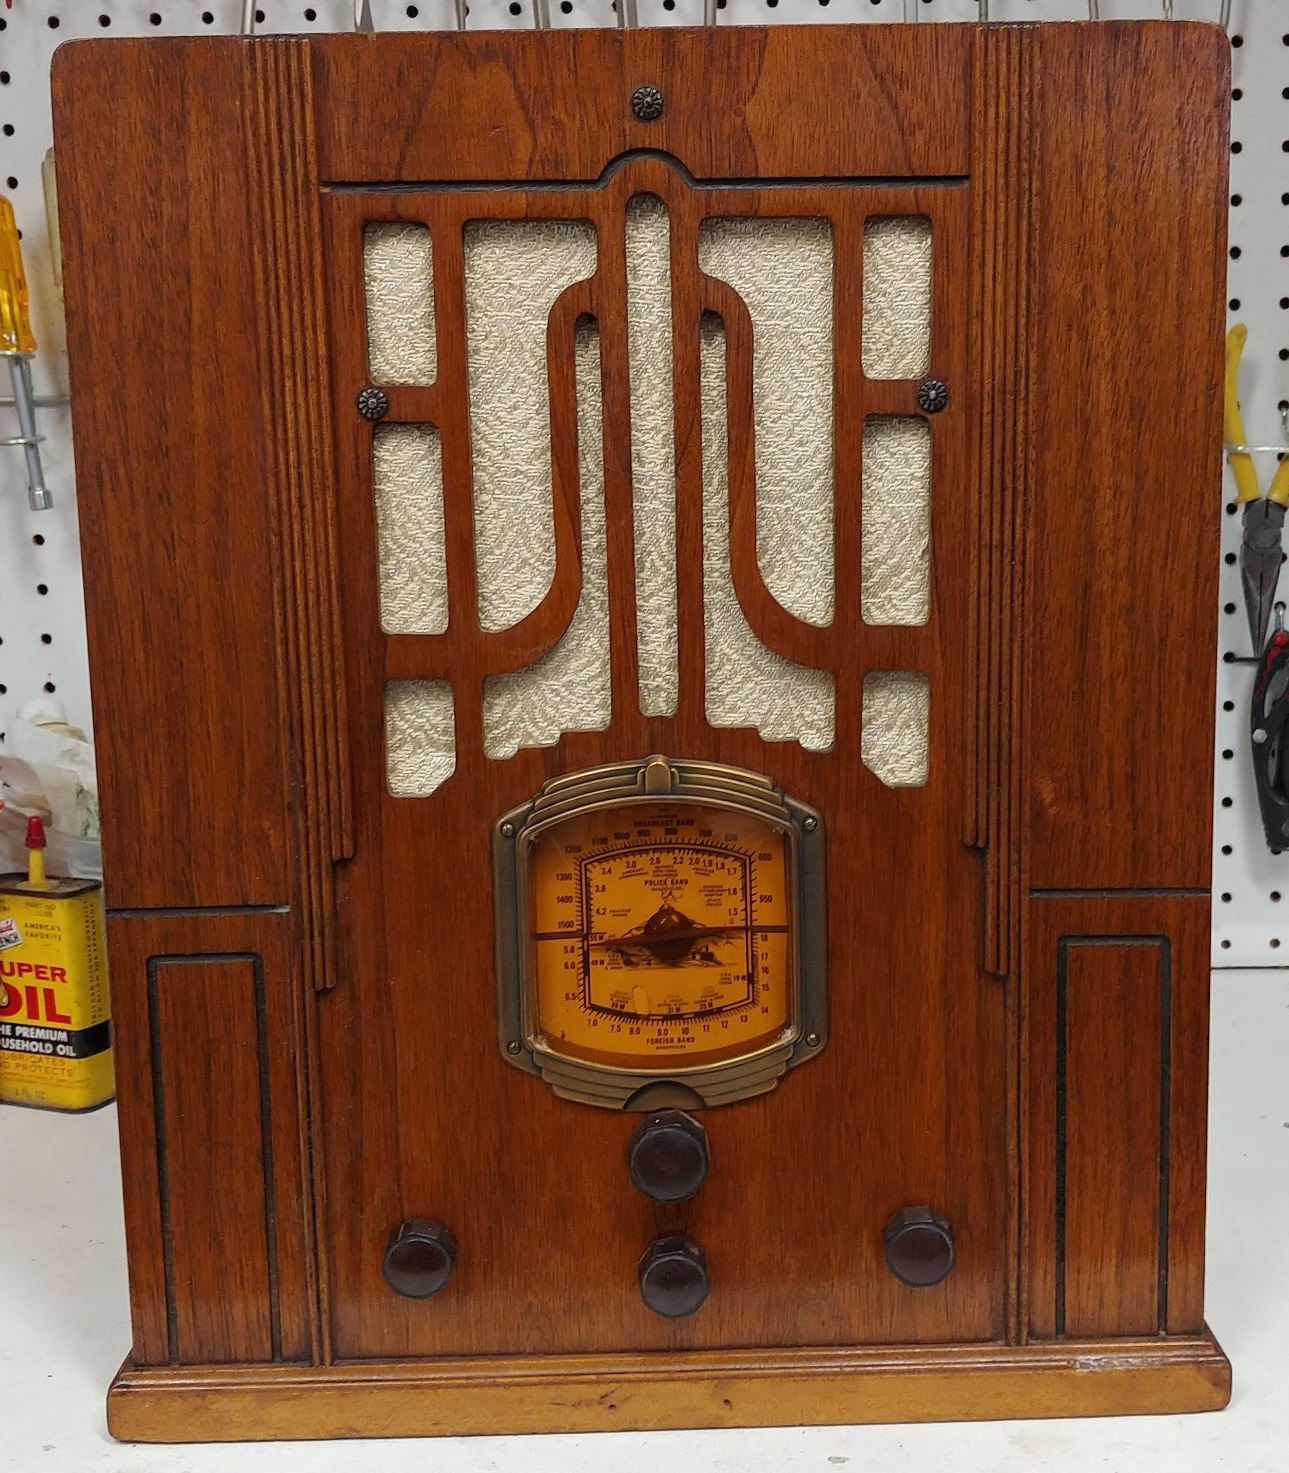
Just acquired my first tombstone and the earliest I have, around 1936. I found out that Aetna made radios that Walgreens sold out of the drug stores in the 1903/40s. I didn't even know Walgreens was around back then
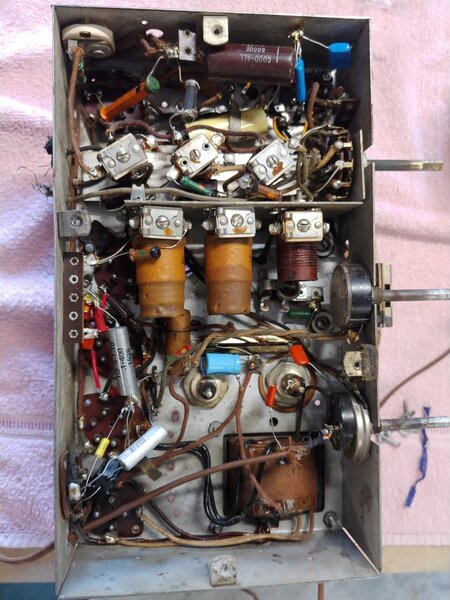
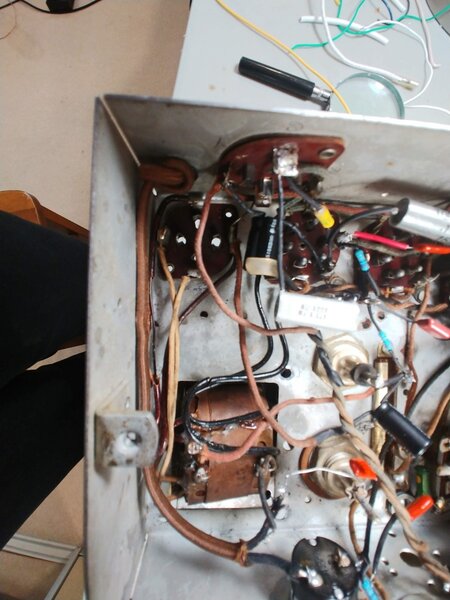
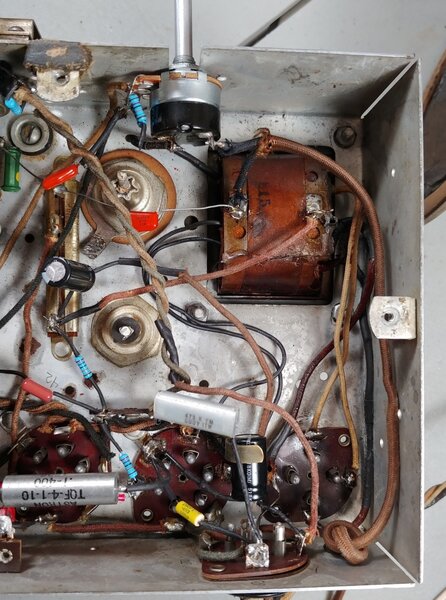
Sadly someone had already replaced the caps so I felt that I needed to trace the circuit and compare to the schematic. But a lot the schematic I found online is quite different from the actual circuit. For instance the radio has three bands AM, Police and "Foreign" and I think the schem I have is just AM
not all the pots and switches and coils in the radio are in the schematic. This is the one I have - https://elektrotanya.com/aetna_19a66w_r ... nload.html
I am hoping that someone might provide me some help in locating a complete and correct schematic
The radio is also missing the antenna. What would be the correct way to construct a loop that would be properly tuned to this radio.


It keeps getting better...
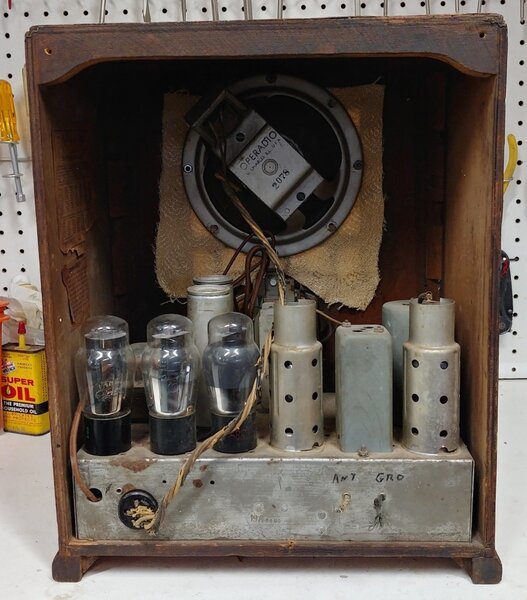
All the schematics show 6A7 as the pentagrid (most interesting tube) with a 7 pin base.
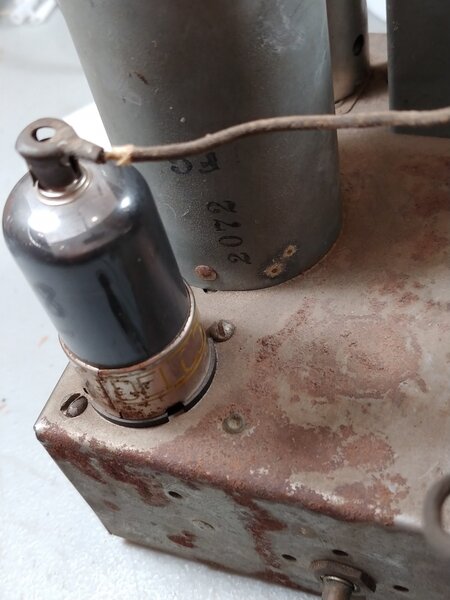
But my radio has the 6A8 with an Octal base. For some odd reason someone replaced the revitted 7 pin socket with a screwed in octal. Wiring to the 6A8 is a hack too.
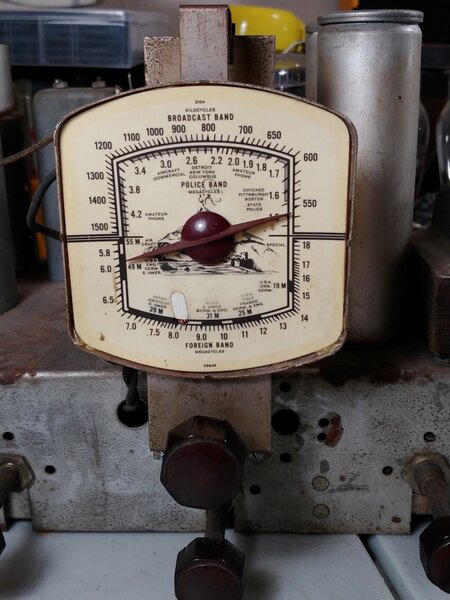
The original faceplate does not have the name "Aetna '' below the mountain like all the others I have seen. Seems for some odd reason someone removed the name. The dial pointer is a replacement as well
Dial Cord
The dial cord was just a single loop between the upper and lower pulley. Did not work well and kept slipping. So I added a dial cord spring with a double wrap on the upper pulley to tighten the cord.
works much better. EDIT the dial cord with spring wasn't as good as I originally reported, as it kept slipping. Since I could not source the original plastic dial wheel (see later post), I figured that a single cord wrapped once on the bottom and twice on the top would work. I pulled the cord tight and tied a knot on top with a drop of tacky glue, and viola perfection. Nice tuning control that feels great. New pic below.
BTW - does not yet get any reception with a long straight antenna wire. But many of the resistors are way out of spec so the voltages are way off. That's the next step. Also still a couple of paper caps will need to go too.
Original dial cord approach with spring, kept slipping and spring interfered with light bulb
new dial cord approach - much better, no slipping and great tuning control
Speaker Repair
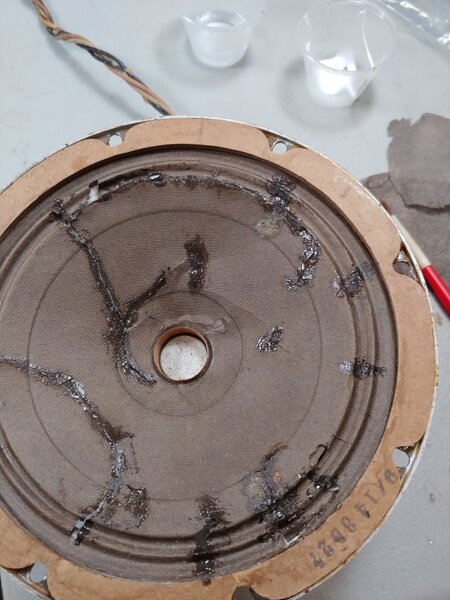
I noticed a few cracks in the speaker.
I have restored other old speakers using tacky glue and humidification with really good results.
But I was not prepared for what I found. What a hack!!
I could not believe that someone used hot glue to seal the cracks and holes in the cone.
Started to look for a replacement speaker and/or a re-cone service.
But first, I wanted to see what rejuvenation could be applied.
After a couple of days in a humidifying enclosure to add some flexibility to the dried out cone, I proceeded...
Using a hair dryer and toothpick I softened and removed the big globs of hot glue
Lots of open cracks and holes (not caused by me) remained with an amount of shiny hot glue residue
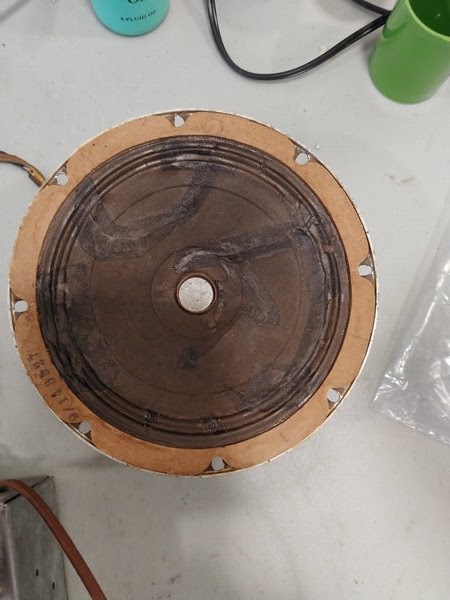
Then I made some patches using India Ink to dye used black tea bags which seemed to closely match the cone.
I watered down the tacky glue and used that to wet the patch and the cone then positioned patches over the cracks and holes.
Then using the same watered tacky glue I applied to the surround as dope for flexibility.
This helped the darker patches to match the cone so I applied a light coat on the whole speaker. Its very light and very flexible.
I think this is as good as it can be without a re-cone, but considering the other hacks of this radio might not justify the expense. Sounds decent, but not sure it's better than before. Now back to improving reception.


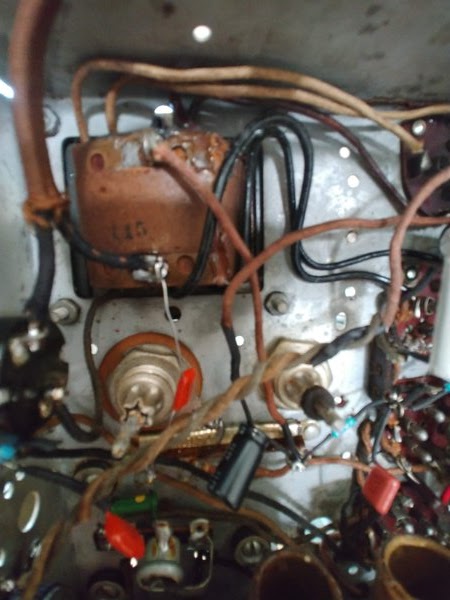
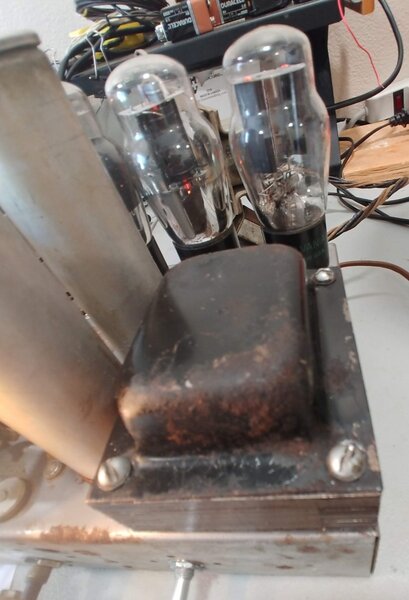
Power Transformer Buzz/Hum
This radio has a slight buzz coming from the transformer.
When I press on the top bell cover it changes pitch.
It does not do anything when I press the laminations.

The hot glue guy at work again on the transformer
Power Transformer Buzz Fixed
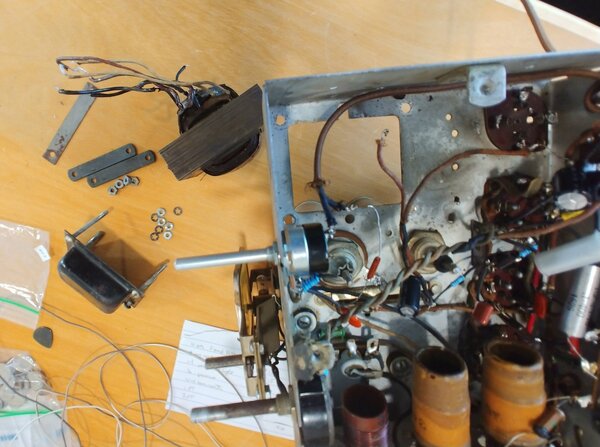
I discovered that many of the laminations were loose so I removed the transformer for repair
I gently opened the loose ones and wicked some lacquer in and clamped over night.
Any laminations remaining loose the next day got some epoxy.
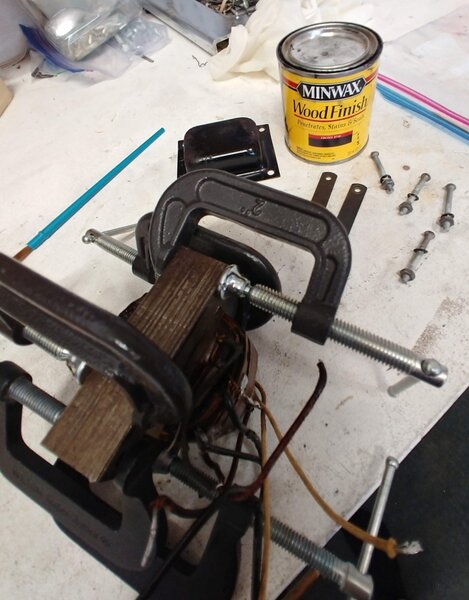
After assembly, I brushed more lacquer on the outside of the laminations
Also the paper on the winding was dry age chipping so it also got a coat of lacquer
The bell cover got a coat of black stain which did not do much other than darken the patina a bit
The insulation on the wires was dry cracking apart so they got a heat shrink treatment.
After reinstallation, something caused the volume to be super low, but all the voltages were correct
I think it was a short somewhere as when I moved all the components back into their place the volume was restored. This thing is very loud with the dual 42 output tubes (wonder how they would do in guitar amp).
And the best of all - no more transformer buzz!!

Intermittent Low Volume Fixed
In the transmitter repair post I mentioned that the volume was really low, thinking there was a moved component short.
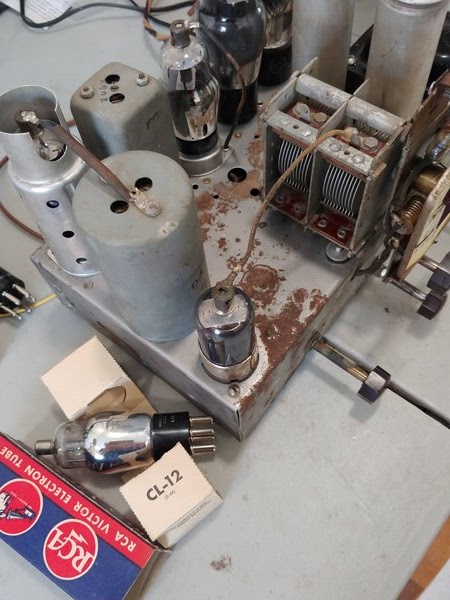
Well it returned today. It turned out that the plate voltage on 75 was less than a volt!
Troubleshooting lead me to remove 75 shield because the grid voltage wasn't right.
Turned out the shield was grounding 75 grid wire.
Added a couple of heat shrinks to insulate original wire and aligned shield hole over the wire.
Sounds as good as new except it still has too much static for my taste, but 2x42 is really loud again.

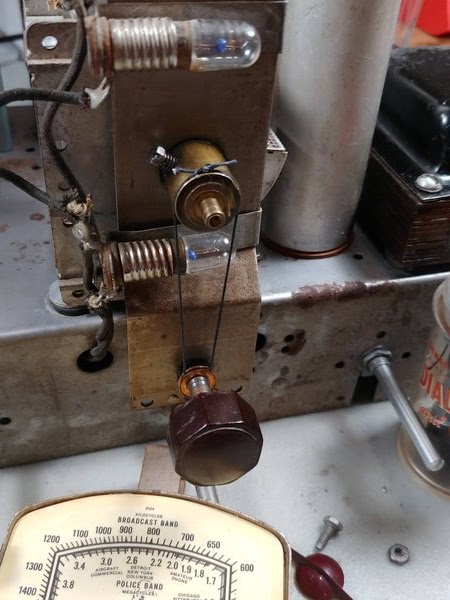
Fixing the 75 Plate/Grid Voltage
Turns out the plate and the grid of the original 75 tube were shorted together.
Never a good thing. A new RCA 75 solved the problem and we have a loud radio again.
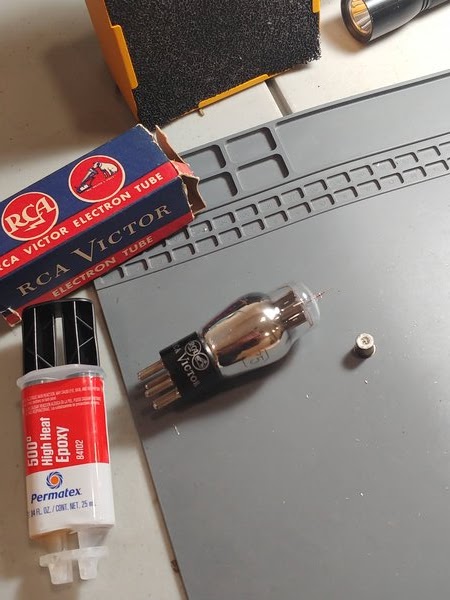
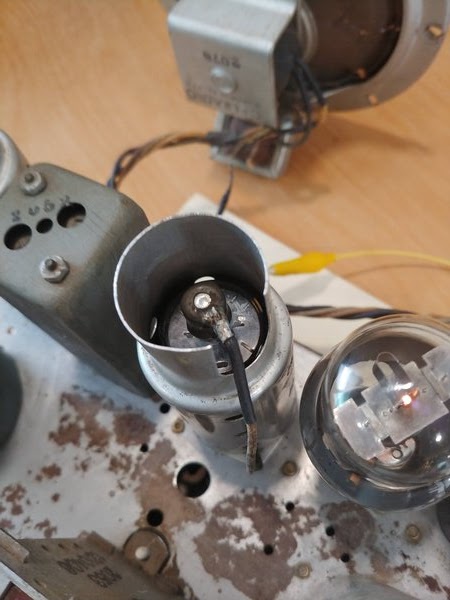
Repair Grid Cap on the "NOS" 75 Tubes
So I bought two 75 RCA tubes represented as NOS. One was, one was not.
When opened the one tube had a hack solder repair on the grid cap. It worked in the radio but when I removed the wire socket to install the shield the tube grid cap came right off!!
Fortunately, the wire was long enough and the vacuum was not compromised.
I set off to try a repair.
After cleaning the glass and removing excess solder from the cap
I put a bead of hi-temp epoxy on the glass and set the metal cap in, being sure the wire poked through the hole.
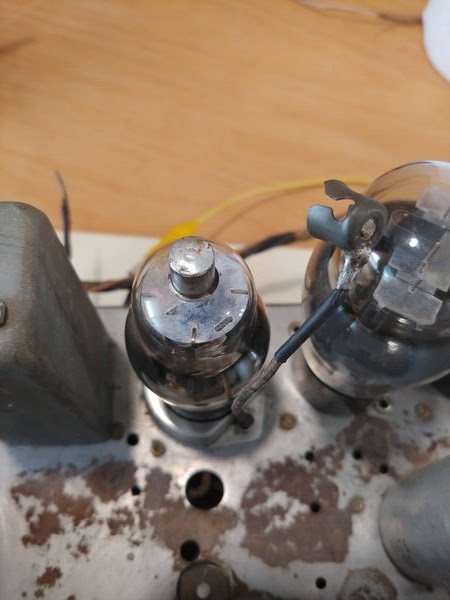
After a quick clamp, I soldered the wire to the cap and checked to be sure all was right
Then back into the clamp for curing.
After fully hard, I added more solder to give the cap its signature dome (wasn't present in the NOS received)
It looks good and should be solid for new life in the Aetna.

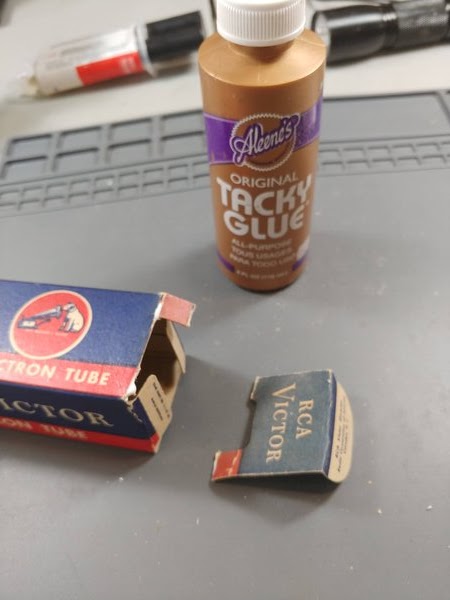
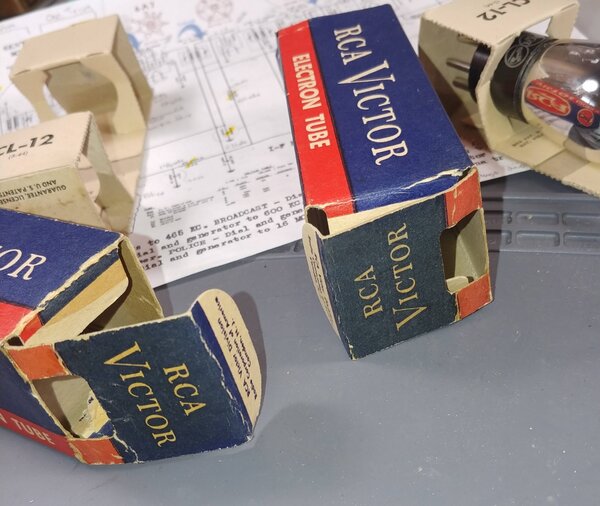
Repair Vintage Tube Box
I love old paper and cardboard. Picked up the bug and repair technique from an old hobby of collecting post-war Lionel trains. I found that Tacky glue used correctly is excellent to repair boxes and their joints, as well as old paper and books, Tacky Glue is flexible and strong so it works on flap hinges really well.
The NOS 75 Tubes I bought came with really nice boxes. I wanted to restore them as best I could. Even though the tubes are working in the radio, the boxes are still part of their history and need to be preserved.
With a toothpick, I apply a little tacky glue to both sides of the flap and carefully align it. Wipe off the excess and do my best to flatten it with gentle finger pressure against the flat surface. Double check alignment and flatness and set it aside to cure. Being sure underneath is not sticking. After fully cured the joint will be pretty strong and usable.